 |
| Fig 1. The contents. |
1) Gold bit - a caliper mount.
2) Upright (note that this is the correct orientation for it).
3) Pointy bit (no idea what it's called)
4) Black bit (no idea what that's called wither)
5) Shim, and two washers.
On the box are also some bolts, more shims, a spacer and a nut.
 |
| Fig 2. Attach (1) to (2). |
Step 1:
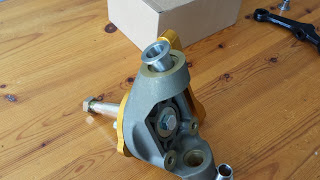
Fit the caliper mount to the upright using the three small bolts. When on the car, the mounting holes on the caliper should face to the rear of the car. Also, if you look carefully, on the large inner hole on the caliper mount there is a recess on one side. This recess should be on the outside as in fig 2.
 |
| Fig 3. Attach (3) to (2), not forgetting a washer. |
Slide the pointy bit into the large hole in the middle, there is a large washer which fits nicely between the two. See fig 3.
Step 3:
 |
| Fig 4. The bolt holds (3) in place. |
Step 4:
Screw the bolt onto the end of the pointy bit as in fig 5.
Step 5:
 |
| Fig 5. Add the bold to (3). |
And that's it, they can now be fitted to the car. Waitaminute I hear you say, what about the black bit and the other stuff?
 |
| Fig 6. Add the shims to (2). |
If you do test fit the black bit to the upright using the longer bolts, you'll notice that the bolts are too long. This is because the wheel arch mounts attach to the black bit too which spaces the bolts out.
One big caveat! This is how I did it and what made sense to me. I've no idea if this is the correct way or not, if I find out it's not, I'll edit this page and put a note at the top to say that it's changed. Hopefully no one will rely on this page and will have figured it out themselves or already know what they're doing and are only reading this so that you can have a laugh with your mates at how I've done it wrong and how the first pot hole I hit is going to eat my car :)
 |
| Left overs, they can't be important :) |
No comments:
Post a Comment